My stucco has cracks. Now what?
Stucco cracking is an issue that homeowners ask me about all the time. Large exterior wall surfaces are eye-catchers, so when the surface becomes laced with cracks, it will definitely get a homeowner’s attention.
Are cracks a problem or not?

Most homeowners fear the cracks indicate a serious structural problem. Fortunately that is rarely the case. The bad news though is that stucco cracks can lead to moisture problems. For this reason, they should not be ignored.
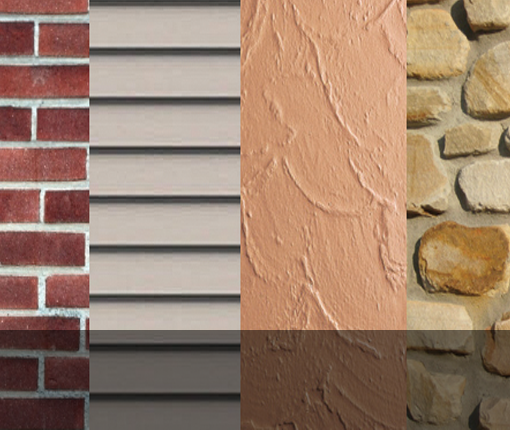
Stucco is a type of hand-applied cement siding that has been used for years in the US on all types of homes. There are literally millions of structures built with stucco in this way. Please read the following information if you have a home with a stucco exterior and are curious how to take care of it.
Is stucco good material or not?

Stucco is an excellent exterior building material. It is clean looking, hard, extremely durable and can withstand all sorts of heat, cold, wind and abrasion. Good craftsmen can install stucco on flat planes or it can be rounded or curved to almost any shape. It can also be finished with various surface colors and textures. Stucco design is only limited by the artistic talents of the installer. This makes the use of stucco quite attractive and suitable for many architectural styles. Oh, and it is also reasonably priced.
Application
The term stucco refers to a complete stucco-system of waterproof paper, wire mesh, nails, flashing, concrete and labor. The main ingredient is a type of concrete made with a specific mix of sand, Portland cement, lime and water. Installers apply stucco to the exterior of the home in a series of layers that develop a final thickness of about ¾”-1”. The stucco ingredients are mixed thoroughly to a “stiff” consistency, then hand-troweled wet over a wire lattice backed with two layers of special paper.

Stucco is not waterproof
Since stucco is not water-proof, the underlying paper layers serve as a moisture barrier separating the stucco siding from the wood framing. The first stucco coat is called a “scratch” coat and as its name implies, it has a rough surface so the next coat will adhere to it. The scratch coat is followed by what’s called a “brown” coat. The brown coat is followed by the “finish” or color coat.
Installers add decorative textures and color during the finish coat. For best results, apply the stucco mix within a temperature range of 40-80 degrees Fahrenheit. (See other installation tips below.) The mixing and application process, if done properly will help minimize cracking and when it comes to stucco, the fewer cracks the better.
Moisture risks
Pristine stucco with a good layer of paint will shed water quite well even though it is not water proof. Over time, the stucco will develop cracks that can allow the moisture to penetrate behind the stucco. Once moisture gets behind the stucco, the only thing preventing massive wood rot is the paper moisture barrier.

You do not want moisture to get behind the concrete stucco. If the waterproofing paper layers behind the stucco have damage it can allow moisture to then directly attack the wood framing. Since none of this is visible, the damage can go on for years and become quite extensive.
The nature of concrete
Due to the nature of concrete, stucco cracks are inevitable and not necessarily an indication of defects. They can occur from normal movement caused by the house’s wood frame settling and shifting, or the shrinkage-induced stresses that occur during the stucco drying process. Stucco is a hard, stiff , concrete material and it is usually applied over wood framed structures. Wood framing is not completely rigid. It can move as the wood dries and shrinks, or it can flex slightly from wind pressure or seismic shifting. For these reasons, it is not unusual for stucco to develop cracks.
Normal cracking
Small, tight cracks indicate what you would expect to show up normally over time from a quality stucco installation. On the other hand, massive amounts of cracking, spalling, efflorescence or powdery surface conditions likely indicate defects. Wide cracks (larger than 1/8”- ¼”,) areas of the surface no longer on a flat plane, or if the stucco has come loose and chunks break off of the wire may indicate structural problems.

Structural problems
If structural problems or installation defects are suspected, have an engineer take a look. Any confirmed problems like excessive structural movement, a bad stucco mix or installation defects are serious and should be remedied.

Seal minor cracks with a paintable caulking material that will prevent moisture from penetrating behind the stucco. This is slow work and must be done carefully not only to ensure a good seal but to also match the aesthetics of the original surface. This means matching the texture of the newly sealed cracks, so they blend into the surrounding areas. To blend textures properly sometimes means redoing entire large sections of the wall surface.
Ignoring cracks
Ignoring cracks is a decision of last resort. I would only do this with a high degree of confidence that the rest of the underlying components (waterproof paper layer, flashing and weep screeds) were properly installed. I would not recommend pressure washing of a stucco wall with cracks as the washing will force water through the cracks and into the space behind.

Issues to be aware of
There are other problems with stucco that homeowners should be aware of. For instance, at the bottom edge of stucco walls built after about 1980, there is a horizontal piece of metal called a weep screed. A weep screed allows water that may penetrate through the stucco to exit from at the bottom of the wall. It also provides a nice line for terminating the lower edge of the stucco wall.
Soil clearance
The weep screed is good at helping to remove moisture problems, but it also creates a vulnerable area (the exposed bottom edges of the wood sheathing.) These exposed raw edges are precariously close to the soil around most homes.
This is why newer building codes required four to six inches of clearance between the soil and the bottom edge of the stucco wall. An improvement to the weep screed method would be to add some flashing at the bottom of the system to protect the lower edge of the sheathing and maintain the clearances called out by code.
No weep screed?
Many stucco walls built prior to the 1970’s were constructed without a weep screed. Instead the stucco finish simply extends down the face of the foundation and tapers off into the soil. This method causes several problems. First, the condition does not allow moisture that inevitably gets behind the stucco a way to get out. Also, the stucco does not always adhere uniformly to the concrete footing.

Areas where the stucco is not adhered well to the footing creates a pathway for termites and other insects to travel from the soil into the framing of your home. If you have this condition, have it inspected to determine the condition. It may be a good idea to correct it. Correction means carefully removing the lower edges of the stucco to above the framing line, then installing a weep screed and patching the stucco.
Summary
Stucco is a good, durable exterior building material and will perform well for many years. Mend any cracks promptly. If you are thinking of installing or repairing stucco yourself, there are excellent “how to” guides available online. If you are using a pro, it is most important to find and hire a good, reputable and experienced stucco contractor.
Eleven ways to ensure quality Stucco
-
Use good contractors: Hire an experienced licensed contractor with good references. Be willing to wait for the right contractor if necessary.
-
Measure ingredients carefully: Don’t get sloppy here. Use a uniform measure like a bucket to measure out the ingredients. Don’t use a shovel to measure.
-
Mix ingredients properly: Always mix the ingredients per the manufacturer’s instructions.
-
Use only clean sand: Note that all sand is not the same. Purchase and use only clean sand as this makes a big difference in stucco quality.
-
Consider using a bagged and branded stucco mix that comes already pre-measured. This reduces the potential for bad or poorly measured ingredients. That said, experienced, quality contractors can mix their own just fine, and less expensively.
-
Be patient: allow slow-curing of each coat of stucco. The scratch coat should be 3/8” thick, and it should cure for 48 hours before the brown coat is applied. In hot or dry climates or windy weather, keeping the stucco moist during the curing period may require frequent wetting. This is called moist curing.
-
Drying between coats: The next (brown) coat, must be allowed another slow-cure of 48 hours. The brown coat should also be 3/8” thick (or per the manufacturer’s recommendations). After the moist-cure is completed, let the entire system dry-cure for 10 days (even though most manufacturers require only five days). Try to keep the system from overheating. Extra curing time improves strength and minimizes cracking.
-
Final thickness can vary: The final or color coat must measure at least 1/8” thick, and the overall final assembly should measure no less than 7/8” thick. Some codes only require a total ¾” thickness, but quality installers agree that’s too thin and will lead to cracking.
-
Keep weep screed openings clear: Don’t obstruct the weep screed at the base of the wall with paint or other finishes. This needs to be free draining.
-
Seal cracks properly: Don’t rely on any type of paint as a remedy for sealing cracks and avoiding leaks; testing shows that it won’t work. Seal any cracks with caulking only.
-
Protect raw wood edges: Add flashing at the lower edge (bottom) of stucco walls (below the weep screed) to protect the vulnerable exposed edge of the wood sheathing.
Help me to help you
Congratulations on taking time to use this free website. I hope you find the information here fun and useful? Please send me your comments and feedback. Writing and maintaining this site is a lot of hard work. By sharing these pages with your friends, you help me to continue the effort. You can easily share these pages to all your favorite social media sites via the shortcut buttons on the sidebar. You can also simply email the page link to your friends. Please share often.
The very best way to help me occurs when you use the embedded links to buy things. Using a link is easy and free, yet it provides a great source of support for this site. The vendors I’ve chosen to link to have proven to be the very best resources available so that is why I recommend them personally.
This is the place to visit if you want information on your home: How to improve air quality; ways to improve the value of your home; what are the best cleaning services; do you really need handyman services; how to plan and execute home renovation and home improvement projects; ways to hire a handyman; what to do during spring cleaning; ways to go about tidying up a messy house; and generally how to be a better homeowner.
If you have questions or just want to say hi, please send me a note.
Thanks again!